
Have you ever thought a few stud lines could completely change your home’s vibe? Using interior wall framing is a clever trick that lets you arrange pre-cut 2×4 studs to reshape your space just right. It’s perfect for carving out cozy nooks or open work areas without the hassle of a full remodel. Next, we’ll guide you through the simple steps and tools needed for a fresh, updated look. Small tweaks can make a big style difference, just imagine the transformation!
Overview of Interior Wall Framing Principles
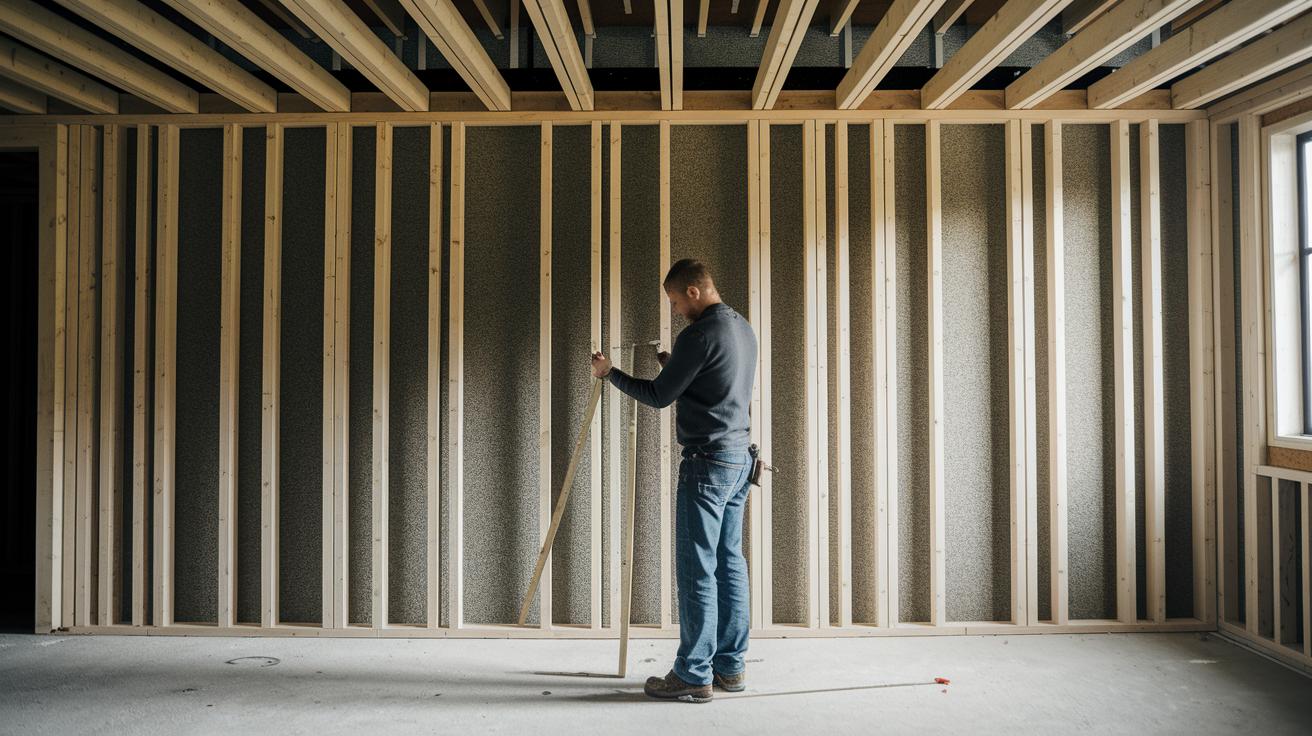
Interior wall framing is a clever way to carve out spaces in your home without disturbing its overall strength. You use pre-cut 2×4 studs, each 8 feet long and spaced 16 inches apart, to build rooms that feel both intentional and adaptable.
This method works beautifully for turning open areas into cozy spots, like a snug library nook or a stylish workspace. It's practical and efficient, letting you update your design without any major structural work.
Key parts include:
- Studs
- Top/Bottom Plates
- Headers
- Blocking
- Fasteners
The process starts by marking the wall’s spot with chalk lines on both the floor and ceiling, it sets the stage just right. Next, you cut the top and bottom plates and position them carefully while placing the studs at each 16-inch mark using a speed square for perfect measurement. Then, you create openings for doors and windows by adding headers and extra support pieces. Finally, you lift the frame into place, secure it to the existing structure, and double-check the alignment. Step by step, this approach ensures your interior spaces are smartly divided and built to last.
Essential Tools and Materials for Interior Stud Framing
Before you dive into your framing project, it helps to gather all your tools and materials so you can build smoothly without interruptions. Getting everything set up in advance means you'll save time and avoid frustration.
Here’s a list of the essentials you'll need:
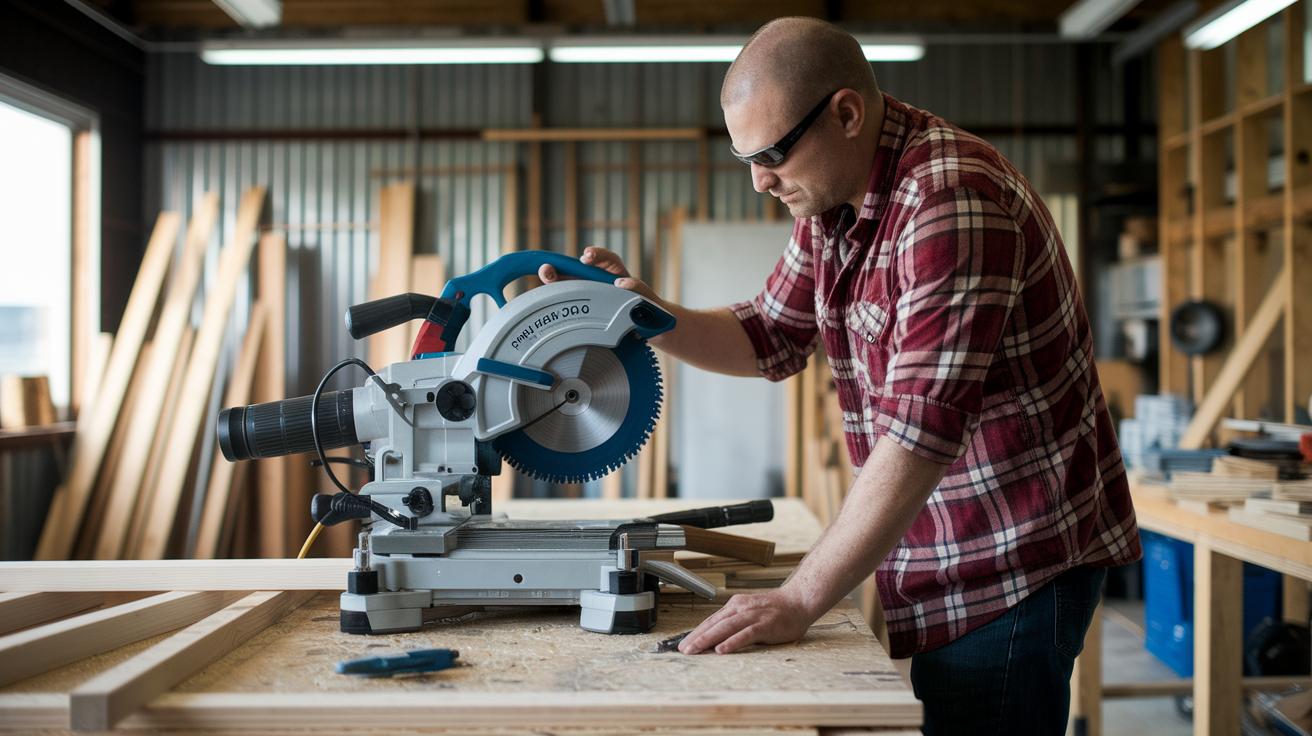
- Miter saw
- Impact driver
- Framing nailer
- Utility blade
- Prybar
- Dremel tool
- Speed square
- Chalk line
- Pre-cut 2×4 studs
- Top and bottom plates
- Headers for openings
- Support pieces (jack studs and cripples)
Sometimes, a level or a masonry drill bit might come in handy when working on different surfaces. And if you want that extra precision, go ahead and choose professional-grade options.
Planning and Layout Techniques for Interior Wall Framing
A clear and precise layout is the foundation of a well-framed wall. When you take the time to mark accurate lines and tidy up your workspace, you set yourself up for a smooth build where every cut fits just right. It’s like sketching out the blueprint for your home’s fresh style, a solid plan truly makes all the difference.
- First, find your ceiling joists so you know exactly where to attach the top plate. Think of it like finding the perfect spot to hang a statement piece of art.
- Next, snap chalk lines along both the floor and ceiling to mark out where your wall will go.
- Then, clear away any floor molding or obstacles that could get in your way.
- Mark where the studs will go at 16-inch intervals using a speed square. This tool helps keep everything in line and easy to follow.
- Use a laser level or the simple 3-4-5 method (a quick trick to check right angles) to double-check that your lines are straight, especially if the room isn’t perfectly square.
- Finally, clearly draw the top and bottom plate lines where your studs will line up.
Before you make any cuts, take one more look at every measurement. A quick re-check, like comparing your chalk lines to a trusted level, can save you time and keeps your wall looking sleek and smart.
Assembling Plates and Installing Studs in Partition Walls

Start by getting your top and bottom plates ready. Cut them neatly to match the wall’s length, kind of like measuring fabric for that perfect dress. A quick run along the edge can spot any little bumps or flaws.
Next, stack the cut plates against the ceiling to figure out your stud lengths. Mark each one and cut with care. A handy tip is to use a square (that little tool to keep everything even) to make sure your board stays true. It’s a bit like fitting the perfect puzzle piece.
Then, lay your plates on a smooth, flat surface and mark where your studs should go using a speed square. Instead of sticking to a fixed rule, trust your eyes and a level to space them just right, much like arranging chairs so they all line up nicely.
Before you lift the entire frame, take one last look at everything. Check that every stud stands straight and the plates align with your marks. If something feels off, fix it quickly with a shim or a re-nail. A final good look ensures your work comes together seamlessly.
Framing Door and Window Openings in Interior Walls
To start off right, proper framing of door and window openings means you first figure out the rough opening requirements. Make sure you mark these spots exactly on your wall so they’re straight, level, and follow the building rules. Did you know that measuring each opening twice before you install anything can really make a difference?
After that, secure a sturdy wood header above each opening. Depending on the weight your wall will handle, cut the header so it’s between 10 and 14 inches thick. Imagine a chef carefully slicing fresh vegetables into neat layers, that’s how cleanly you want to set your header.
Don’t forget to support the sides too. Place strong jack studs on both sides of the opening to hold up the header. For extra strength, add cripple studs and crutches underneath and above the opening so everything stays solid even when the weight changes.
Before moving on, check that every opening is perfectly square. Use a level and a measuring tool to ensure all the corners form right angles. It’s a bit like checking a picture frame before you hang it, every little detail helps keep your home looking chic and smart.
Raising the Wall Frame and Securing to Existing Structures
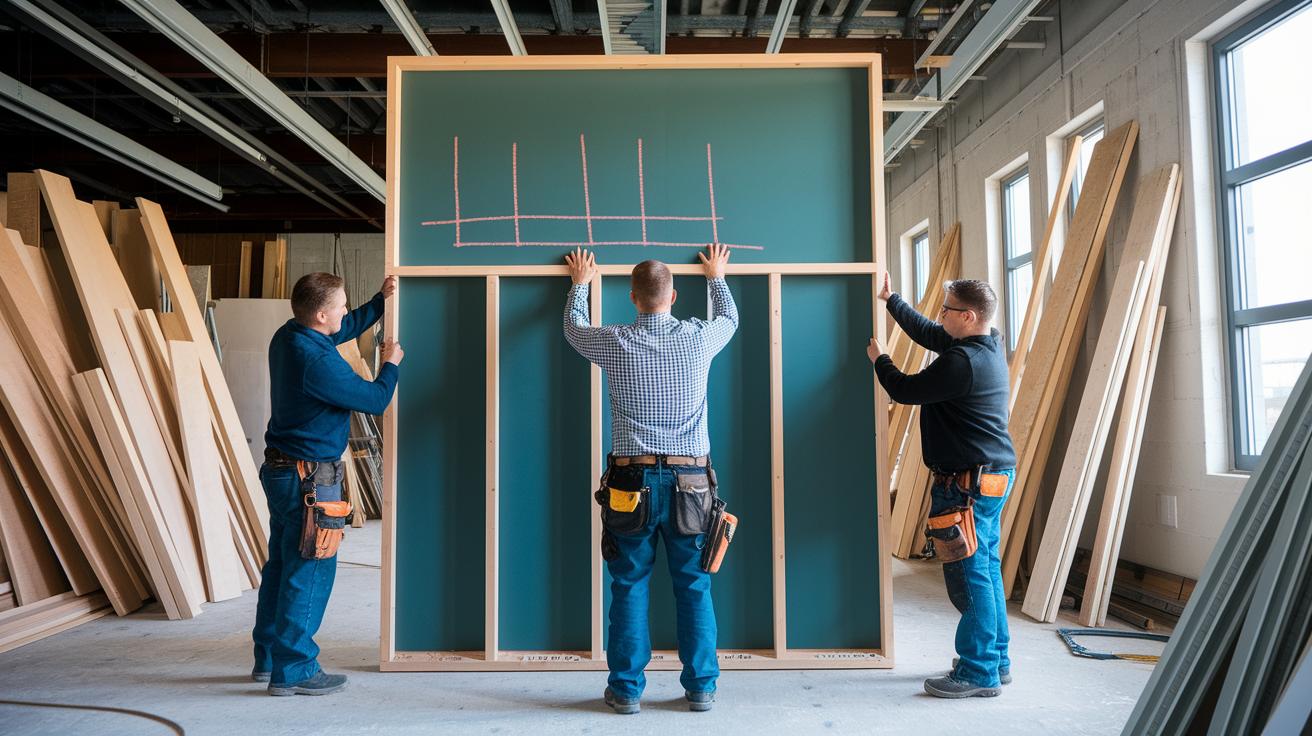
Start by gently lifting your built wall frame into place, making sure it lines up perfectly with the chalk marks on your floor and ceiling. It’s a smart idea to have a friend help or use temporary supports to keep it steady as you move it. Picture it like hanging a delicate piece of art, with every edge aligning just right. And fun fact: top designers test every little move before launching a new product to ensure a flawless fit.
Next, secure the frame to your current structure. If you’re working with wood, nail the top plate to the ceiling joists and the bottom plate to the floor joists using framing nails or a framing nailer. For concrete slabs, drill pilot holes with a masonry bit and use Tapcon screws for a solid hold, kind of like hanging your favorite picture frame on a brick wall.
Finally, if your surface isn’t perfectly even, start by fastening the end studs along with a center stud. Then, check that your frame is straight with a level before you finish nailing it down. This careful step makes sure your wall stands straight and true, ready to give your space a chic, modern vibe.
Adding Blocking, Insulation, and Drywall Finishing Tips
Begin by reinforcing your wall with well-placed blocking between the studs. Think of horizontal blocking as adding hidden strong beams that support everything, much like extra support in a sturdy bridge. For taller walls (over 8 feet), try a herringbone pattern, it not only boosts stability but also gives you a secret network of strength to lean on.
Next, turn your attention to insulation, a key player in keeping your room cozy and quiet. Fiberglass batt works wonders by reducing noise and stabilizing temperature, almost like tucking your wall in with a soft, efficient blanket. Before you install insulation, make sure all electrical and plumbing tasks are finished. This way, everything fits snugly, much like finding the perfect puzzle piece.
Finally, move on to hanging your drywall. Carefully place the sheets, tape the seams, and smooth everything out with joint compound to create a sleek finish. Yes, it can get a little messy (dust and bits of debris are just part of the creative process), but imagine each step as a brushstroke adding style and structure. In the end, your wall transforms into a chic, well-supported canvas ready for its final touches.
Building Codes, Troubleshooting, and Cost Considerations for Interior Framing
When you're getting started on interior framing, local building codes usually require non-load-bearing walls to be built with standard 2×4 studs that follow industry practices. These rules tell you that you don’t need pressure-treated lumber for interior walls, but you do need the right headers above openings to keep things sturdy. In many areas, using solid wood headers for doors and windows isn’t just a suggestion, it’s part of keeping everything safe and up to code.
Getting your measurements right is key, and even small errors can cause a big headache later on. If you have an uneven floor, try placing shims under the bottom plate to level things out. And if your room isn’t perfectly square, you can use the handy 3-4-5 method to check your right angles. Sometimes, uneven ceiling heights mean you’ll need a laser level for that extra bit of precision. A few simple steps like re-snapping your chalk lines and double-checking your measurements before cutting can really save you time and frustration.
Budgeting for your project means thinking about both material and labor costs. On average, 2×4 studs cost around $3–$5 each, and fasteners might add another $20–$30 to your expenses. For a budget-friendly boost in soundproofing, insulation batts are typically about $1–$2 per square foot. While tackling a DIY project might be more affordable overall, keep in mind that complex openings can bump up labor costs by 15–25% if you decide to call in a professional. Balancing these factors will help you figure out whether to dive in yourself or let an expert handle the tricky parts.
Final Words
In the action, we embraced the core of interior wall framing, from planning layouts to adding drywall finishes. Each step, such as measuring stud spaces or securing framing nails, builds up a detailed yet clear guide for a functional, stylish space.
Following the outlined process means a smooth build, careful measurements, and confident choices that lead to results you can admire. Enjoy the satisfaction of transforming your space with every precise cut and secure nail.
FAQ
What are interior wall framing details?
Interior wall framing details include using pre-cut 2×4 studs spaced 16 inches on-center, along with top/bottom plates, headers, blocking, and fasteners to create a secure, non-load-bearing partition.
What does an interior wall framing diagram show?
An interior wall framing diagram shows the layout of studs, plates, and headers, illustrating stud spacing, cutouts for openings, and the arrangement required to form a sturdy interior partition.
How does the guide explain framing a wall from start to finish in PDF form?
The guide explains framing a wall by outlining each step—from planning the layout and cutting plates to installing studs, creating openings, securing the frame, and finishing the surface—providing instructions similar to a downloadable PDF manual.
How do you frame a wall corner?
Framing a wall corner involves carefully aligning intersecting studs and adding support blocks to maintain square, plumb angles, ensuring the corner remains stable and the overall structure is secure.
How do you frame a wall on concrete?
Framing a wall on concrete requires pre-drilling with a masonry bit and using Tapcon screws for the bottom plate, while aligning the frame with chalk lines on both the floor and ceiling to ensure proper placement.
What is the step-by-step wall framing layout?
The step-by-step wall framing layout involves marking plate lines, snapping chalk lines on the floor and ceiling, locating studs every 16 inches with a speed square, and verifying alignment using a laser level or the 3-4-5 method.
How is an exterior wall framed?
Framing an exterior wall follows similar methods to interior walls but includes additional elements like exterior sheathing, proper insulation, and weather barriers to protect against outdoor elements while meeting building codes.
What does wall framing design involve?
Wall framing design involves choosing the proper stud size (typically 2×4 for non-load-bearing walls), precise stud spacing, and the integration of headers and blocking to create a durable and code-compliant partition.
What is the standard interior wall framing?
Standard interior wall framing typically uses pre-cut 2×4 studs at eight feet in length, spaced 16 inches apart, forming a reliable framework for non-load-bearing partitions in home construction.
Should interior walls use 2×4 or 2×6 lumber?
Interior walls commonly use 2×4 studs for non-load-bearing partitions; however, 2×6 studs might be chosen for extra insulation or when building requirements call for additional structural strength.
Are interior walls framed with studs 16 or 24 inches on-center?
Interior walls usually have studs installed at a 16-inch on-center spacing to provide optimal support, although some designs might use 24 inches on-center for non-load-bearing walls in specific cases.
Do you use 4×2 or 3×2 lumber for a stud wall?
Stud walls are typically constructed with standard 2×4 lumber, as this size meets most building requirements, while 4×2 or 3×2 dimensions are uncommon and generally not used for framing wall studs.
