
Ever wondered if you really need fancy decor to make your home look amazing? Well, think about it, sometimes the simplest DIY projects can work wonders without costing a fortune. Imagine turning a bare wall into your own mini art gallery or breathing new life into vintage trinkets to create stylish accents.
In this guide, you're going to find cool, budget-friendly ideas organized by season and room. Each suggestion is designed to help your personality shine through while keeping your space practical and trendy. Ready to blend creativity with a touch of DIY magic? Let's get started and craft a space that truly feels like home.
DIY Home Decor Projects to Achieve a Stylish Space
Start your home styling journey with creative ideas that show you don’t need a fortune or a professional to make your space shine. We’ve grouped projects into fun themes like seasonal decor for fall, winter, spring, and summer, or you can pick ideas by room to perfectly match your vibe. Imagine turning a plain wall into a personal art gallery or reviving old picture frames to highlight your cherished memories. Even a touch of pallet wood can add a charming rustic twist to a modern space. Picture a gallery wall filled with various frames, each reflecting your unique style.
Mix practical tricks with creative flair as you dive into projects like boho macramé hangings, refreshing furniture flips, or even updating old lampshades to change the mood of any room. You might style your bookshelf in a fresh way, craft cool candle holders out of mason jars, or experiment with playful fabric art. Try spicing up your living area with pom-pom trimmed ottomans or a handy blanket ladder. One fun idea is a coffee table decoupage using simple supplies to create a custom look, or even making your own storage bins paired with tissue-paper blooms to merge style with function.
Every project comes with a detailed list of materials and cost estimates ranging from just $5 to $30, making it easy for anyone to jump in. Think of these ideas as flexible blueprints that can be tweaked to fit your space and personality. So why not experiment with creative curtains, cork crafts, and personalized pillows to build a stylish and welcoming home that’s totally you?
DIY Wall Accents: Unique Projects for Striking Room Focal Points
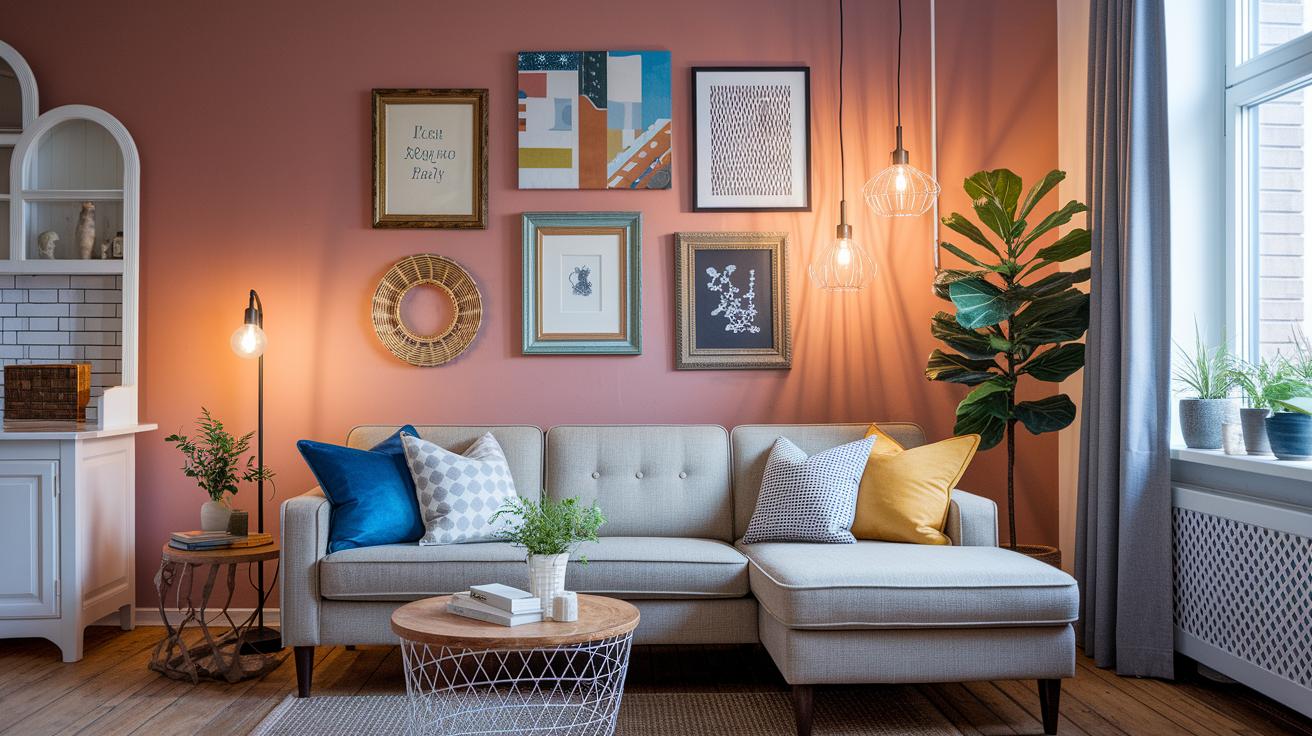
Breathe new life into your plain walls by creating your very own art gallery. These projects mix a burst of creativity with a wallet-friendly approach. You’ll find an easy list of materials, clear steps, cost estimates, and fun design tips for each idea so you can easily turn any wall into a standout focal point.
-
Canvas gallery wall with mixed frames
Materials: Grab some pre-stretched canvases, various frames, adhesive hooks, and a bit of primer.
Steps:- Lay your canvases on the floor to plan a cool layout.
- Hang the frames neatly using a level so everything lines up just right.
- Fill in any empty spots with a splash of artwork.
Estimated cost: Around $20.
Design tip: Try mixing different frame colors and sizes for a display that's fun and dynamic.
Video Tutorial: Check out a guide on mixing and matching canvases.
-
Picture frame remix using thrifted finds
Materials: Dust off some old picture frames, a can of spray paint, and a few decorative embellishments.
Steps:- Clean and gently sand the frames for a smooth start.
- Spray on a light coat of paint to give them a fresh spin.
- Add your favorite accents like lace or beads for that extra charm.
Estimated cost: About $10.
Design tip: Lean into a vintage vibe by opting for a slightly worn, distressed finish.
Video Tutorial: Watch a quick video on how to upcycle your frames.
-
Pallet wood plank accent installation
Materials: Gather some reclaimed pallet wood, sandpaper, a natural wood stain, and nails.
Steps:- Sand each wood plank until it feels smooth.
- Brush on a natural wood stain to enhance its character.
- Secure the planks on your wall with nails for a rustic look.
Estimated cost: Roughly $25.
Design tip: A natural stain really brings out that charming, earthy vibe.
Video Tutorial: See a step-by-step tutorial on pallet wood projects.
-
DIY grid gallery wall with simple leveling tools
Materials: You’ll need your favorite picture frames, a level, a pencil, and a measuring tape.
Steps:- Sketch out your grid layout on paper first.
- Mark your wall with a pencil, using the level to keep it straight.
- Hang your frames in a neat grid for a polished look.
Estimated cost: Around $15.
Design tip: Keeping things evenly spaced creates a feeling of balance and harmony.
Video Tutorial: Watch a grid layout guide to help set the stage perfectly.
-
Stenciled faux-marble or geometric accent
Materials: Pick up some stencils, a mix of faux paint, small rollers, and painter’s tape.
Steps:- Place the stencil on your chosen spot on the wall.
- Gently roll the faux paint over the stencil.
- Carefully remove the stencil to reveal a clean, crisp design.
Estimated cost: About $18.
Design tip: Playing with geometric patterns can add a really modern twist to your decor.
Video Tutorial: Enjoy a quick stenciling demo for more inspiration.
Each project is designed to turn your walls into a stylish backdrop that shows off your unique taste, and it’s easier than you might think!
Artisan Furniture Revival: DIY Makeovers for One-of-a-Kind Pieces
Chalk Paint Dresser Flip
Start by giving your thrifted dresser a nice clean and a gentle sanding to smooth out any rough spots. First, slather on a generous coat of chalk paint so the dresser comes alive with a fresh, soft finish. Then, lightly sand the edges and corners to create a charming, distressed look. Finally, seal your work with a matte topcoat that protects the piece and keeps it looking lovely. This project will cost you roughly $30. Pro tip: Work in a well-ventilated space, and let each layer dry completely before you move on.
Thrifted Sideboard to Sink Vanity
Imagine turning an old sideboard into a cute, functional sink vanity. Gather your essential tools, a measuring tape, saw, jigsaw, drill, and all the necessary hardware like handles. Measure carefully for your plumbing needs before making any cuts. Mark the spot, cut out the area for your sink, and smooth the edges with a bit of sandpaper for a polished look. Finish up with a water-resistant sealant to guard against moisture. You’re looking at a budget of about $40 to $50. Tip: Always double-check your measurements to ensure everything lines up perfectly with your plumbing.
High-Gloss Rolling Doors
Give your space a sleek, modern vibe by transforming a thrifted bi-fold door into stylish rolling doors. Begin by gathering your sandpaper, primer, high-gloss paint, and fresh door hardware. Sand the door thoroughly and apply a primer to create an even surface. Next, paint with two thin coats of high-gloss paint, letting plenty of drying time in between. Finally, install the new hardware for smooth, rolling action. You can wrap up this fun project in just one afternoon. Remember: Keeping your workspace clean will help you avoid dust settling on your just-finished paint job.
For more in-depth guidance on transforming vintage finds, check out our vintage home decor tutorial.
Handcrafted Lighting Innovations: DIY Fixtures to Brighten Your Stylish Space
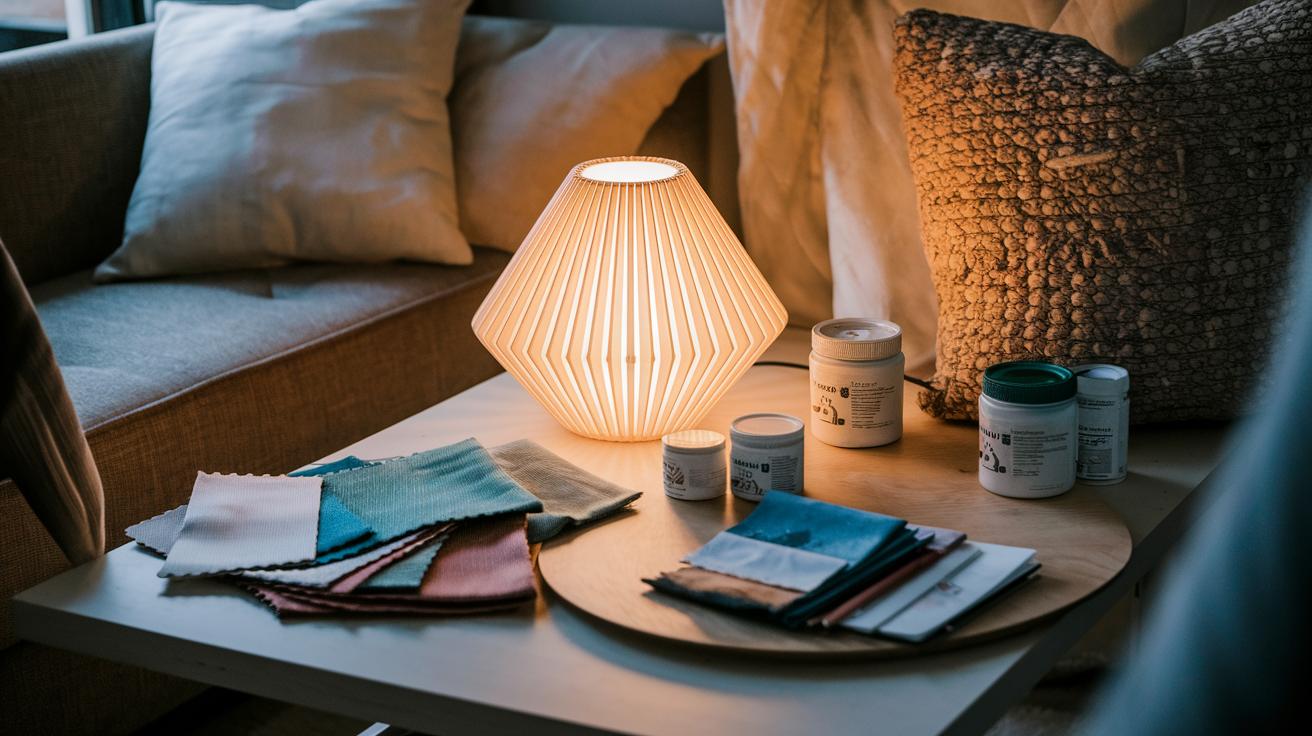
Looking to add a warm, stylish glow to your room? Here are three fun DIY lighting projects that perfectly mix chic looks with everyday practicality. Each idea comes with a list of what you need, easy-to-follow steps, a design tip to spark your creativity, a rough cost, and even a video tutorial suggestion for extra help.
Lampshade Refresh
Revamp an old lampshade by giving it a fresh look. Gather your old lampshade, some decorative fabric or your favorite paint, a glue stick, and a pair of scissors. First, take off the old fabric or clean the surface if you’re leaning towards paint. Next, measure and cut your fabric or set up a small tray of paint. Finally, attach the fabric with glue or paint in smooth, even strokes. A bold fabric print or gentle pastel shade can change your lamp’s entire vibe. Expect to spend around $15 to $20, and check out a quick online video for a visual guide.
Mason-Jar Candle Holder
Add a charming touch with a mason-jar candle holder. You’ll need a few mason jars, some metal accents like small washers or chains, tea lights, and a bit of wire for hanging. Start by cleaning and drying each jar. Then, add the metal accents around the rim or use the wire to secure them. Pop a tea light inside and display your creation on a shelf or hang it up. Mixing different metallic finishes can give it a modern, rustic flair. This project typically runs about $10.
Outdoor Tuna-Can Lantern
Brighten your patio with an outdoor tuna-can lantern. For this project, collect a few empty tuna cans, a nail and hammer to punch ventilation holes, some mini LED lights or tealights, and a can of paint. Begin by cleaning the cans and marking where you’d like the holes. Next, carefully make the holes to create a decorative pattern. Paint the cans for a pop of color and insert your light source. The patterned holes will cast a delightful, warm glow perfect for outdoor evenings. It should cost roughly $8 to $12, and a brief demo online can show you how to safely create those patterns with just a few simple tools.
Eco-Friendly DIY Decor: Upcycled Materials and Sustainable Style
Corkboard Wall Art from Wine Corks
For this project, grab a bunch of wine corks, a plain corkboard or a reclaimed piece of wood, some strong craft glue, and a pair of scissors. Start by cleaning your corks and sorting them out. Next, lay them out on the board in a fun pattern, maybe mark where each cork will sit to keep things neat. Then, glue them down and let everything dry. This creative piece should cost you around $10. Pro tip: try mixing up the corks so they face different directions to add some extra texture and personality.
Rope Basket Planters from Old Rope
For a stylish twist, repurpose some old rope into a chic basket planter. You’ll need the rope, a small recycled container or base, a hot glue gun, and a bit of clear varnish if you want that extra polished finish. Begin by wrapping the rope tightly around your container in a cool spiral pattern. Once you’re happy with the look, secure the rope with hot glue. If you like, add a coat of varnish to up the durability and shine. The whole project comes in at about $8. And here’s a fun idea: use a bold-colored rope or spray-paint it for an extra pop of style.
Driftwood Centerpiece Sculpture
Capture nature’s charm by turning driftwood pieces into a unique centerpiece. All you need is some driftwood, a hot glue gun, and maybe a small stand or base to help it stand out. Start by arranging the driftwood pieces in a way that looks naturally appealing. Secure them together with hot glue, then give it some time to set before you display it. This piece will run you roughly $10. Remember to keep the glue marks to a minimum so the beautiful texture of the wood can really shine through.
Thrifted Lamp Faceplate Refresh
Give an old lamp a new lease on life by refreshing its faceplate. For this uplifting project, you’ll need an old lamp with a removable faceplate, a bit of sandpaper, eco-friendly paint, and a small paintbrush. First, sand the faceplate lightly to smooth the surface. Then, apply two thin, even layers of paint, waiting for each to dry completely. Once the paint is set, reassemble your lamp. The cost is about $15. A neat design tip: pick a paint color that contrasts nicely with the lamp’s base for a striking look.
Scrap-Fabric Throw Pillow
Last but not least, breathe new life into leftover fabric by turning it into a throw pillow. You’ll need fabric scraps, a pillow insert, fabric scissors, and either a basic needle and thread or some no-sew adhesive. Cut the fabric into panels that will cover your pillow form, and then secure them together with minimal stitching or adhesive. Leave one side open to slide in the pillow insert, and once it’s inside, seal it up. This project is super budget-friendly at around $5. For an added twist, mix patterned scraps with a solid fabric to create a modern, eye-catching look.
Textile Pattern Experimentation: DIY Fabrics for Personalized Style
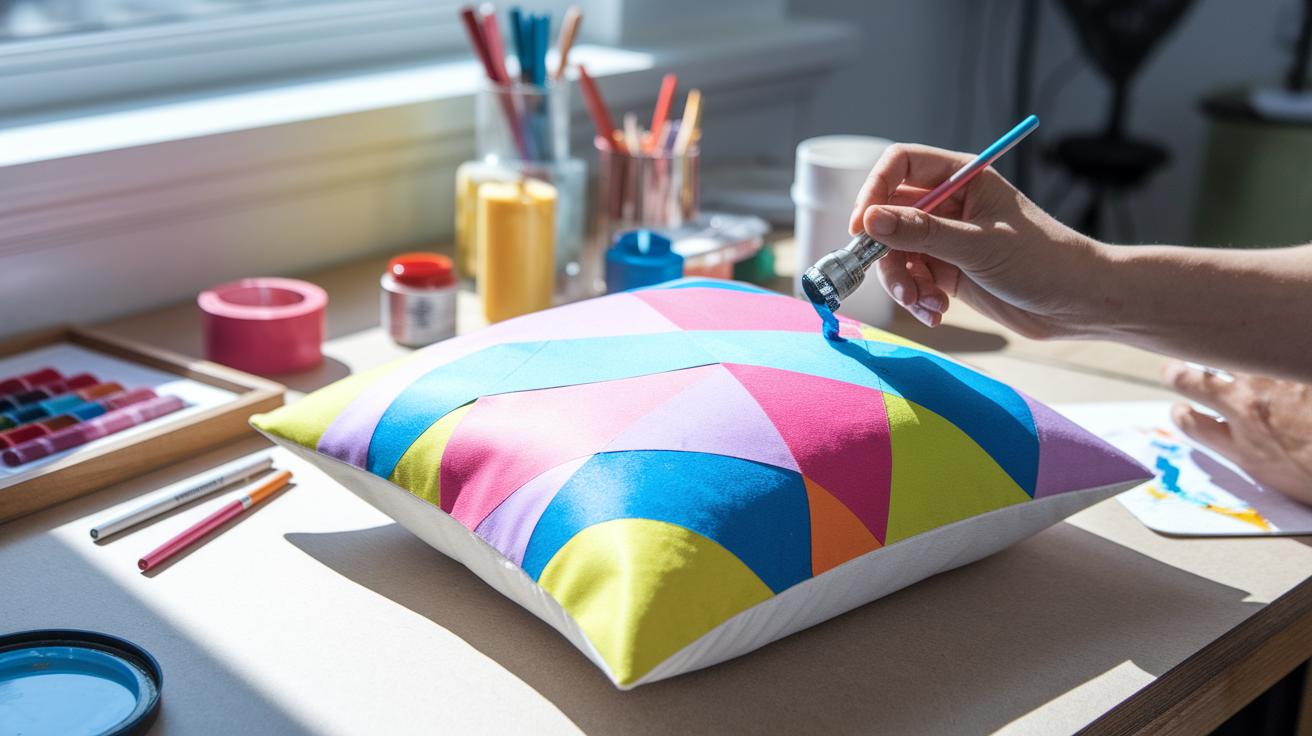
Custom Painted Pillow Covers
Materials: Plain pillow covers, fabric paint, painter’s tape, paintbrushes.
Start by laying your pillow cover on a smooth surface. Use painter’s tape to mark out fun, geometric patterns, think of it like creating your own stencil. Next, carefully brush in the fabric paint inside those taped lines, letting the colors come alive. Once the paint dries, peel away the tape to reveal a striking, crisp design. This project usually costs about $10. For a playful twist, try pairing a pop of sunny yellow with a soft, gentle gray, it’s like giving your cushion a burst of sunshine and comfort.
No-Sew Window Treatment
Materials: One yard of decorator fabric, fabric glue, scissors, measuring tape.
Begin by measuring your window so you can cut the fabric just right, adding extra length for a cute, gathered effect. Then, apply fabric glue along the top edge and press the fabric onto a wooden dowel to create a simple header without any sewing. Hang your creation with curtain clips, and you’ve transformed your window into a stylish focal point, all for around $12. Using patterned or textured fabric brings an instant artistic vibe to your room, making every beam of natural light feel extra special.
Ottoman Slipcover with Removable Pom-Pom Trim
Materials: Durable fabric, removable pom-poms, velcro, fabric adhesive.
Measure and cut your fabric to size, leaving a bit extra for neat seams that you can secure with velcro. Next, stick on the playful pom-poms along the edges using a touch of fabric adhesive; they add a fun, decorative detail. Finish by attaching the velcro so the slipcover is easy to remove and wash when needed. This cool upgrade is roughly $14. Plus, those removable accents mean you can change up your style whenever the mood strikes. If you’d like a visual how-to, just search for “DIY ottoman slipcover with pom-pom trim” for a helpful video guide.
Budget Makeover Techniques: Affordable DIY Home Decor Projects
Revamp your space with smart, budget-friendly ideas that feel both creative and cozy. Instead of rehashing the same old DIY steps, why not focus on where to score the best deals? Imagine planning a whole room makeover with clear cost breakdowns that cover more than just one little project. For instance, many craft stores have clearance sections where you can pick up fabric scraps and decorative pieces for way less than usual.
Here are a few savvy tips for budget decor:
- Check out local thrift and dollar stores to find fun supplies like spray paint, fabric remnants, and cute embellishments, all for just a few dollars.
- Browse community classifieds or join local swap groups to snag free or nearly free treasures like reclaimed wood or extra jars.
- Compare prices at craft outlets and don’t be shy to ask about discounts when buying in bulk; it really adds up.
- Plan ahead by listing your must-have items, then chat with store staff about price matches or special offers, you’d be surprised at what you can get.
| Project Aspect | Estimated Cost Range | Sourcing Tip |
|---|---|---|
| Accent Refresh | $5 – $15 | Scout local thrift stores and dollar shops |
| Lighting Update | $10 – $20 | Look for repurposed items or bulk discounts |
| Wall Decor | $10 – $20 | Find reclaimed wood through community swap groups |
| Creative Containers | $5 – $15 | Reuse items from your pantry or local finds |
Final Words
In the action, we explored room-specific guides, creative wall accents, unique furniture makeovers, bright lighting ideas, eco-friendly projects, and textile experiments. Each section proved that transforming your space can be fun and affordable. The ideas helped break old routines, turning everyday items into cherished design pieces. Whether you’re starting with a simple pallet project or revamping a faded lamp, these tips show that refreshing your home is all about creativity and personal flair. Embrace these inspiring tips and create your own DIY home decor projects for a stylish space.
FAQ
Q: What are some simple DIY home decor projects for a stylish space?
A: The DIY home decor projects for a stylish space include creating handmade wall accents, refreshing furniture with a new look, and designing eco-friendly crafts. These projects add charm and personality without breaking the bank.
Q: What is the 3-5-7 rule in decorating and the 3-4-5 rule in interior design?
A: The rules suggest using odd-numbered groupings for visual balance. The 3-5-7 rule recommends clusters of items for a focal point, while the 3-4-5 rule helps set a proportionate, harmonious layout.
Q: What is the easiest thing to DIY for décor and what is the hottest craft right now?
A: The easiest DIY décor projects are simple wall art and chic paper crafts. Recently, transforming thrifted finds into stylish home accents has been a favorite craft among creative decorators.
